
pxl.deck
pxl.deck
16x16ピクセル。4階調。リアルタイムの映像操作。
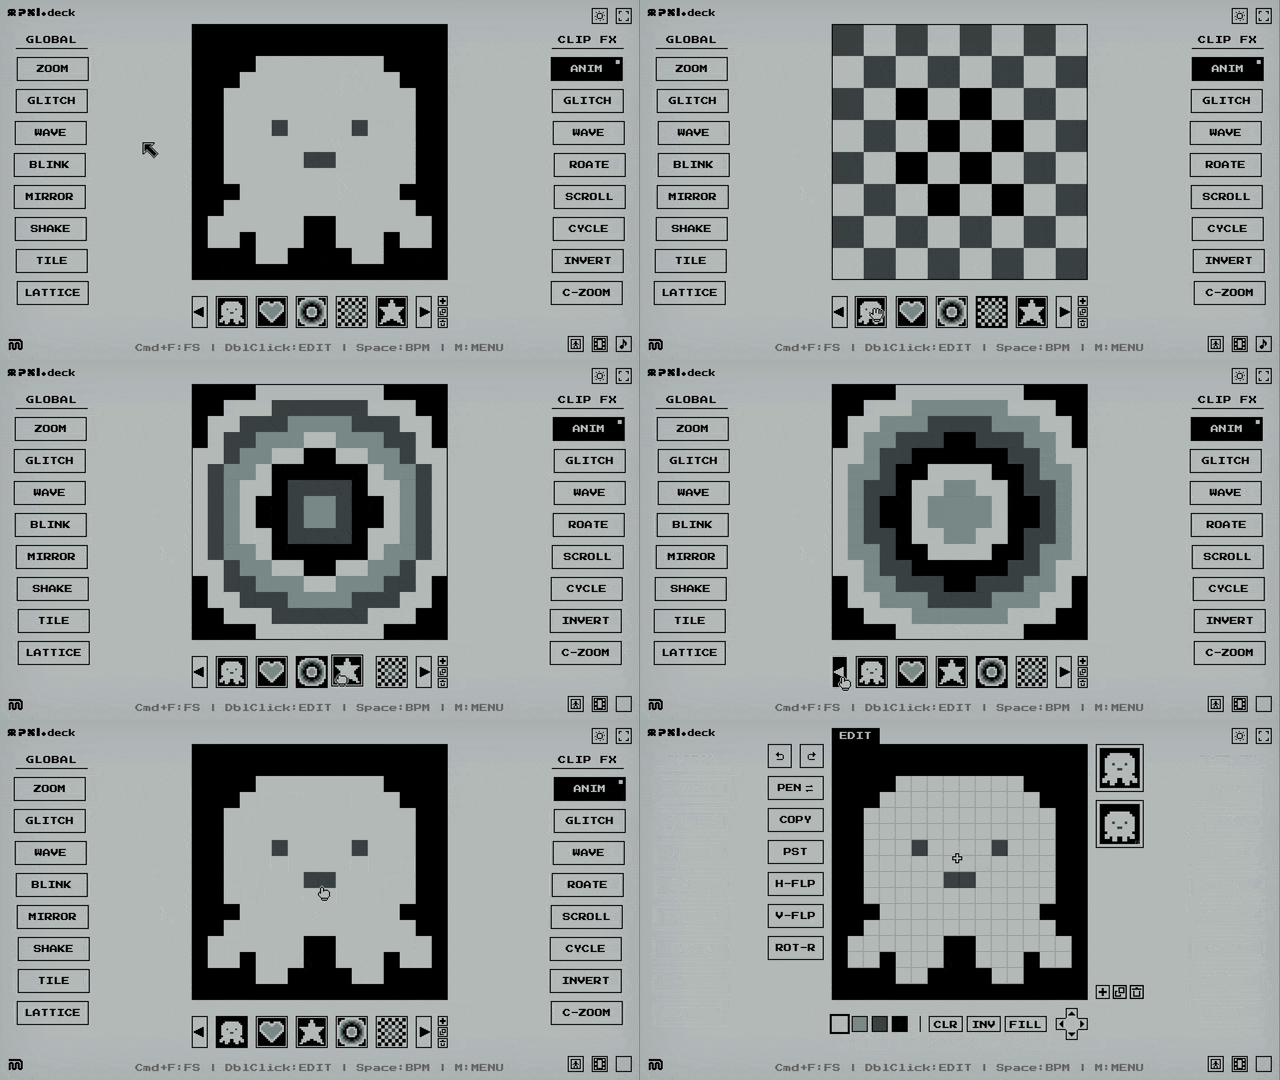
pxl.deck(ピクセルデック)は低解像度のドット絵をその場で打ち、映像として演奏するためのライブペイントVJデッキ。
形を打つ。フレームを増やす。ピクセルをずらす。グリッチさせる。敷き詰める。点滅させる。
ドットを打つたびに感じる心地よさ。
ピクセルグラフィックを完成した画像としてではなくライブで操作する素材として扱う。
最小限のピクセルをその場で描き、触り、演奏するための小さな映像デッキ。
🎮 基本操作とワークフロー
pxl.deckはダウンロードしたHTMLファイルをブラウザで起動するだけで動作します。
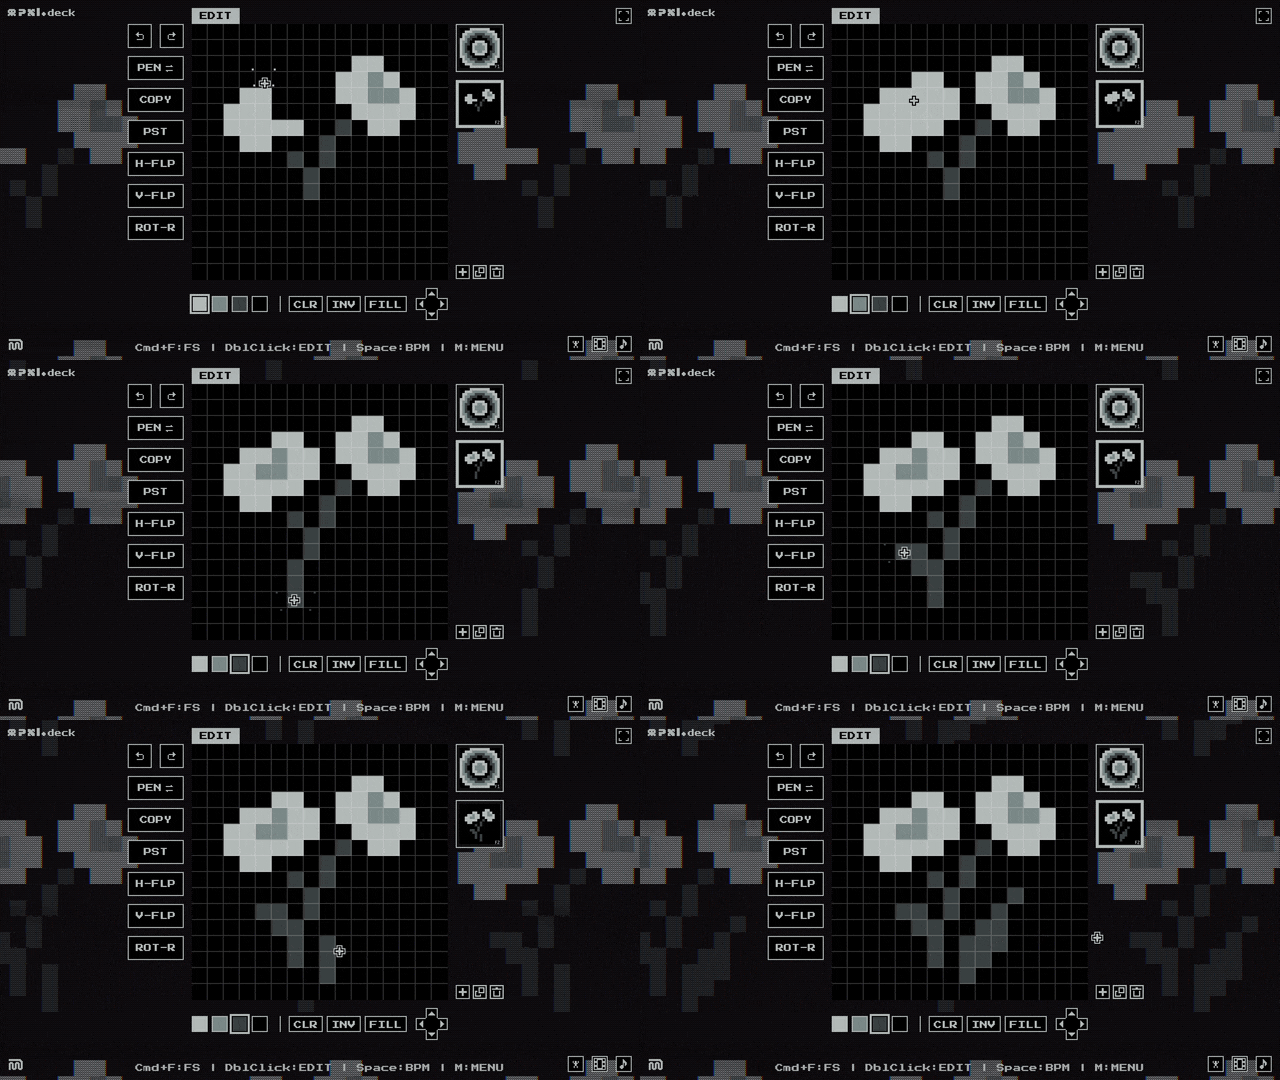
1. EDITモード(ペイント)の起動
- ディスプレイ領域を ダブルクリック することでEDITモードへ移行。
- キャンバス上をクリックまたはドラッグしてグラフィックを描画する。
- キャンバス外を再度 ダブルクリック することでEDITモードを終了し、プレイ画面に戻る。
2. クリップの選択
- ディスプレイ下部のクリップバー(またはキーボードの左右の矢印キー、スロットをクリック)で、再生するスロットを切り替える。
- 複数のスロットに異なるグラフィックを構築し、切り替えて再生を行う。
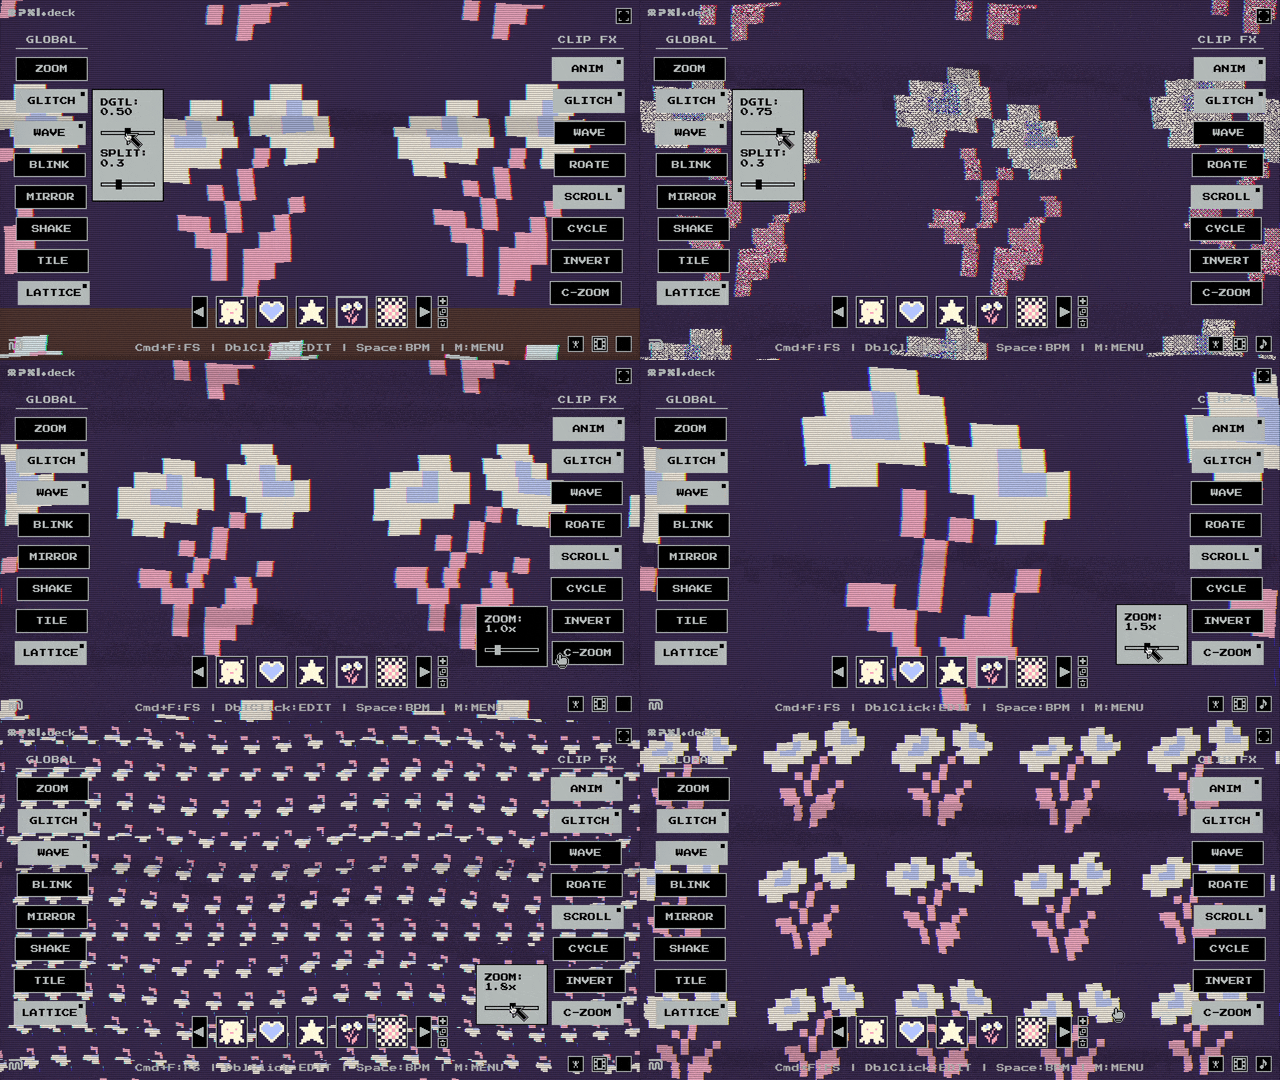
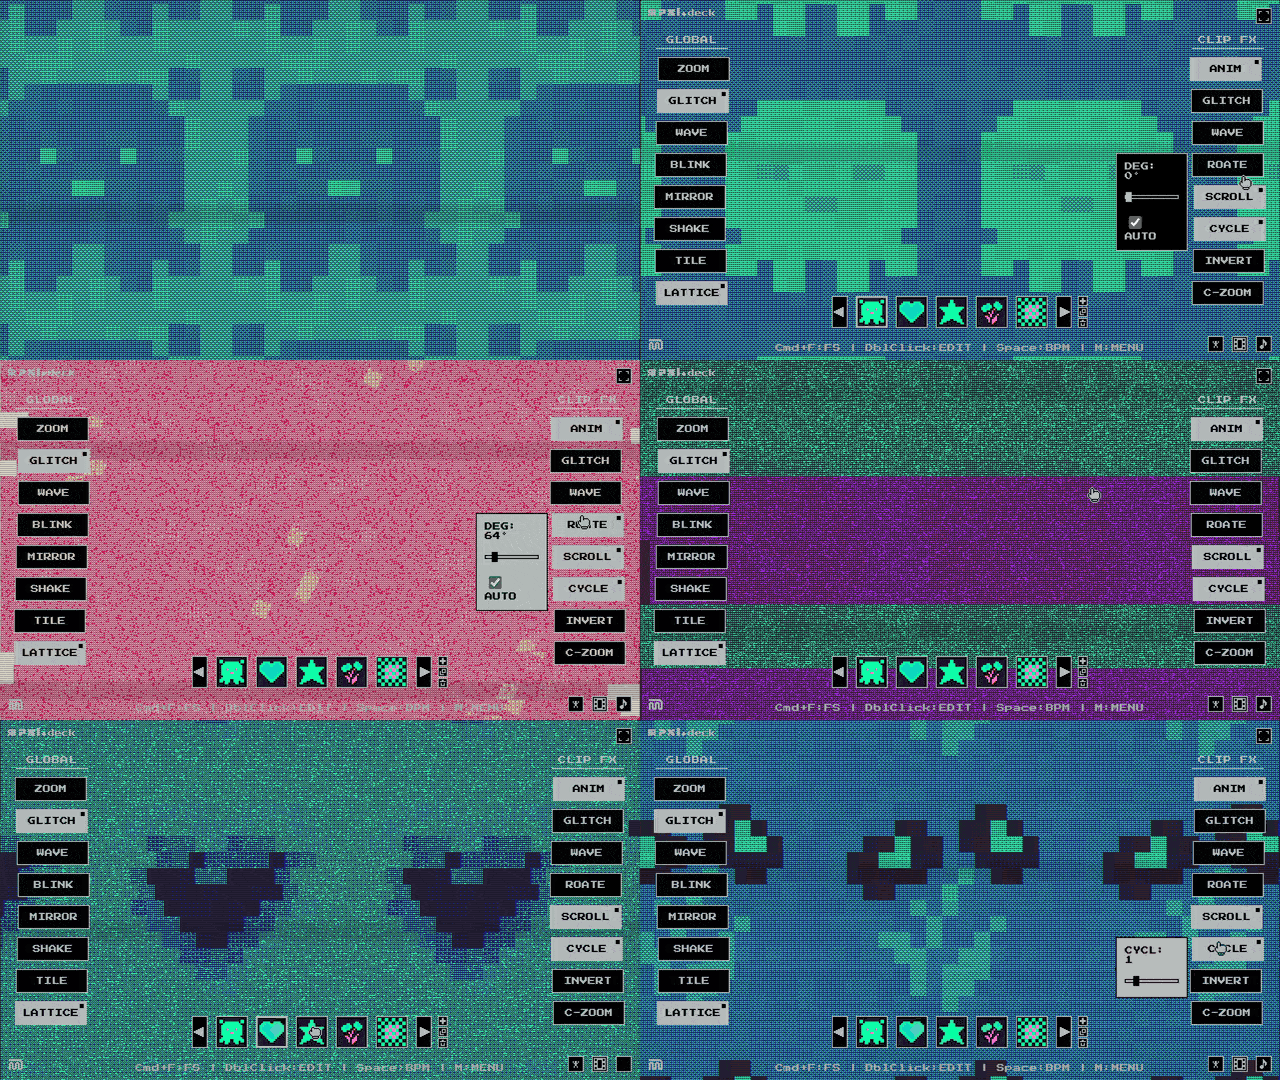
3. エフェクトによる変調
- 左右のパネルからエフェクトを有効化する。
- 左パネル(GLOBALエフェクト): 映像全体に対して、ズーム、グリッチ、ウェーブ、CRT歪みなどの変調を与える。
- 右パネル(CLIP FXエフェクト): 再生中のクリップ単体に対して、回転、スクロール、カラーサイクルなどの変化を与える。
- ボタンをONにしてマウスをホバーさせることでパラメーターを調整するスライダーが出現。ドラッグしてエフェクトの深度や速度をコントロールできる。
4. フルスクリーンとVJ表示モード
- VJ表示モードの切り替え (
Fキー):- 通常モードと、映像出力に特化したVJモードを切り替える。VJモード中は画面全体に映像が広がり、マウスカーソルを画面の端に避けることで操作パネルが自動的に隠れる(フェードアウトする)仕組みになっている。マウスを中央に戻せば、いつでも操作UIが再表示される。
- ブラウザのフルスクリーン化 (
Cmd + F/Ctrl + F):- ブラウザのツールバーやタブ、OSのメニューバーを完全に隠し、ディスプレイの表示領域全体にアプリを表示する。
⚡ 応用テクニック
🎨 ピクセル描画の操作(EDITモード時)
- 右クリックによるクイック消去:
- 右クリック(またはドラッグ)することで、選択中のペン色を切り替えることなく、ドットを背景色(色0)で即座に消去できる。
- Tabキーによるカラー切り替え:
Tabキー(またはShift + Tab)を押すことで、描画に使用するカラーをパレットの4色から順次切り替える。
- 矢印キーによる平行移動(シフト):
- 矢印キー(
↑↓←→)を押すことで、キャンバス上の描画データ全体を上下左右に1ピクセル単位でシフトする。
- 矢印キー(
- 範囲選択(SELECTツール):
- 左パネルの
PEN/SELボタンでツールをSELに切り替えることで、ドラッグによる範囲指定が可能。 - 選択範囲に対して、コピー(
COPY)、ペースト(PST)、水平/垂直反転(HFlip/VFlip)、90度回転(Rot)、塗りつぶし(Fill)、階調反転(Invert)、クリア(Clear)を一括適用できる。
- 左パネルの
- フレームアニメーションの作成:
- 右パネルのタイムラインから
NEW(新規フレーム)やDUP(複製)ボタンでフレームを追加し(最大4枚)、アニメーションを描画できる。 - VJ画面に戻り、右パネルのエフェクト
ANIMをONにすることで、フレームがアニメーションとしてループ再生される。
- 右パネルのタイムラインから
🎹 キーボードショートカット一覧
キーボードのショートカットキーを活用することで、マウスを使わずにすべてのVJコントロールを実行できる。
🎵 システム・VJコントロール
| キー | アクション | 用途 |
|---|---|---|
Space または B
| タップテンポ(BPM同期) | 音楽の拍子に合わせてタップすることで、映像の点滅やインジケーターのテンポを同期させる。 |
F
| VJ表示モード切り替え | 通常の操作画面 ➡ キャンバス最大表示 ➡ UIを非表示にしたフルスクリーンVJ画面、を切り替える。 |
Cmd + F (Mac)Ctrl + F (Win)
| フルスクリーン | ブラウザの表示を全画面(フルスクリーン)にする。 |
M または Esc
| 設定メニューの開閉 | カラーパレットの編集や、作成データのセーブ・ロード画面を開く。 |
G
| ガイド線表示トグル | アラインメント検証用の透過グリッドを画面に重ねて表示する。 |
🎛️ 左パネル:GLOBALエフェクト (映像全体)
| キー | エフェクト名 | 視覚効果 |
|---|---|---|
1
| ZOOM (ズーム) | 映像全体を拡大・縮小する。 |
2
| GLTCH (グリッチ) | 映像がランダムにブレる、ノイズ変位を加える。 |
3
| WAVE (ウェーブ) | 画面全体を波状に歪ませる。 |
4
| BLNK (ブリンク) | 設定されたBPMのテンポに合わせて画面全体を点滅させる。 |
5
| MIRR (ミラー) | 映像を左右対称に反射させ、万華鏡のようなパターンを作る。 |
6
| SHKE (シェイク) | 映像全体を激しく揺らす(低音のトリガー等に適している)。 |
7
| TILE (タイル) | 映像を縮小し、格子状に並べて複製表示する。 |
8
| CRT (ブラウン管) | 昔のモニターのような歪みと走査線ノイズを加える。 |
9
| FPS (フレームレート制限) | 意図的に描写コマ数を落とし、カクカクとした映像にする。 |
🎞️ 右パネル:CLIP FXエフェクト (クリップ単体)
| キー | エフェクト名 | 視覚効果 |
|---|---|---|
Q
| ANIM (アニメ) | クリップに登録された複数フレームのアニメーションをループ再生する。 |
W
| GLTCH (グリッチ) | クリップのピクセルを個別に崩壊させ、ノイズを発生させる。 |
E
| WAVE (ウェーブ) | クリップの座標のみを波状に歪ませる。 |
R
| ROTN (回転) | クリップを回転させる(スライダーで速度調整可能)。 |
T
| SCRL (スクロール) | クリップを任意の方向にスライド移動させ続ける。 |
A
| CYCL (カラーサイクル) | パレットの色を順番にスライドさせ、動的に色彩を変化させる。 |
S
| INVT (階調反転) | クリップの色を反転(ネガ反転)させる。 |
D
| ZOOM (ズーム) | クリップ単体を拡大・縮小する。 |
🎨 カスタムパレットテーマの作成
プリセットされたカラーパレットのほかに、オリジナルの4色を設定して登録できる。
MキーまたはEscで設定メニューを開く。- 「CUSTOM PALETTE」セクションで、4色のカラーピッカーまたはHEX値(カラーコード)を入力する。
- 任意のパレット名を指定し、
ADD NEW PALETTEボタンを押すことで、独自のカラーテーマが登録される。
💾 データの保存と復元(セーブ&ロード)
作成したクリップ、アニメーションフレーム、およびカスタムパレットのデータは、設定メニューの SAVE FILE ボタンから1つのJSONファイルとしてローカルに保存(書き出し)可能。 次回使用時に LOAD FILE からそのJSONファイルを読み込むことで、前回のドット絵とパレットデータを再現できる。
TIPS: 出力画像の保存 出力画面を右クリックすると現在表示中のビジュアルを画像として保存もできる。
👩💻動作環境
推奨環境
・Appleシリコン搭載Mac/Google Chrome 最新版/macOS 13 Ventura以降
・WebGLが有効なモダンブラウザ キーボード、マウスまたはトラックパッド
動作はOSのバージョンよりも、ブラウザ、GPU、WebGLの対応状況に依存します。
☕ 開発者からのお願いとサポートについて
本アプリケーションは個人で開発しているシェアウェア(有料ソフト)です。ですが機能への厳密な対価というよりは、「開発者へコーヒー(または飯)1杯おごる」くらいの気軽な寄付(ドネーション)として受け取っていただけると嬉しいです。
個人での開発・維持のため、動作の完全な保証や不具合の個別修正といったサポートは原則として行っていません。 お使いのPCやブラウザの環境によってうまく動かない可能性もあります。
このページのトップに埋め込まれているアプリが無料のデモ版となっています。画面への「DEMO」表示とセーブ&ロード機能の制限以外は、フルバージョン(有料版)と変わらない仕様になっています。購入をご検討いただく際の動作確認として、ぜひお気軽につついてみてください。
pxl.deck
16x16 pixels. 4 tones. Real-time visual control.
pxl.deck is a live-painting VJ deck for drawing low-resolution pixel art on the spot and performing it as visuals.
Draw shapes. Duplicate frames. Shift pixels. Add glitches. Tile them across the screen. Make them blink to the beat.
Each time you place a pixel, sound, particles, and subtle vibrations respond.
Instead of treating pixel graphics as finished images, pxl.deck treats them as live visual material to be manipulated in real time.
A small visual deck for drawing, touching, and performing with the minimum number of pixels.
🎮 Basic Controls and Workflow
pxl.deck runs simply by opening the downloaded HTML file in your browser.
1. Launching EDIT Mode (Paint Mode)
- Double-click the display area to enter EDIT Mode.
- Click or drag on the canvas to draw graphics.
- Double-click outside the canvas again to exit EDIT Mode and return to the play screen.
2. Selecting Clips
- Switch between playback slots using the clip bar at the bottom of the display, the left/right arrow keys, or by clicking a slot.
- Build different graphics in multiple slots, then switch between them during playback.
3. Modulating with Effects
- Enable effects from the left and right panels.
- Left Panel (GLOBAL Effects): Applies modulation to the entire visual output, such as zoom, glitch, wave distortion, and CRT distortion.
- Right Panel (CLIP FX Effects): Applies changes to the currently playing clip only, such as rotation, scrolling, and color cycling.
- Turn a button ON and hover over it with the mouse to reveal a slider for adjusting parameters. Drag the slider to control the depth or speed of the effect.
4. Fullscreen and VJ Display Mode
- Toggle VJ Display Mode (
Fkey):- Switch between the normal mode and a VJ mode optimized for visual output. In VJ Mode, the visuals expand to fill the screen, and the control panels automatically hide/fade out when you move the mouse cursor to the edge of the screen. Move the mouse back toward the center to bring the UI back at any time.
- Browser Fullscreen (
Cmd + F/Ctrl + F):- Hides the browser toolbar, tabs, and OS menu bar completely, displaying the app across the full screen area.
⚡ Advanced Techniques
🎨 Pixel Drawing Controls (in EDIT Mode)
- Quick Erase with Right Click:
- Right-click or drag with the right mouse button to instantly erase pixels using the background color (color 0), without switching away from the currently selected pen color.
- Switch Colors with the Tab Key:
- Press the
Tabkey, orShift + Tab, to cycle through the 4 colors in the current palette.
- Press the
- Shift the Canvas with the Arrow Keys:
- Press the arrow keys (
↑↓←→) to shift all drawing data on the canvas by 1 pixel in that direction.
- Press the arrow keys (
- Area Selection (SELECT Tool):
- Switch the tool to
SELusing thePEN/SELbutton on the left panel to select an area by dragging. - You can apply operations to the selected area in one go: copy (
COPY), paste (PST), horizontal/vertical flip (HFlip/VFlip), 90-degree rotation (Rot), fill (Fill), tone inversion (Invert), and clear (Clear).
- Switch the tool to
- Creating Frame Animation:
- Add frames from the timeline on the right panel using the
NEWbutton for a new frame or theDUPbutton to duplicate a frame. You can create animations with up to 4 frames. - Return to the VJ screen and turn on the
ANIMeffect in the right panel to loop the frames as an animation.
- Add frames from the timeline on the right panel using the
🎹 Keyboard Shortcut List
By using keyboard shortcuts, you can perform all VJ controls without relying on the mouse.
🎵 System / VJ Controls
| Key | Action | Purpose |
|---|---|---|
Space or B
|
Tap Tempo (BPM Sync) | Tap along to the beat of the music to sync visual blinking and indicators to the tempo. |
F
|
Toggle VJ Display Mode | Switches between the normal control screen, maximum canvas display, and a fullscreen VJ screen with the UI hidden. |
Cmd + F (Mac)Ctrl + F (Win)
|
Fullscreen | Displays the browser in fullscreen mode. |
M or Esc
|
Open / Close Settings Menu | Opens the screen for editing color palettes and saving/loading created data. |
G
|
Toggle Guide Lines | Overlays a transparent grid on the screen for alignment checks. |
🎛️ Left Panel: GLOBAL Effects (Entire Visual Output)
| Key | Effect Name | Visual Effect |
|---|---|---|
1
|
ZOOM | Scales the entire visual output up or down. |
2
|
GLTCH | Adds random jitter and noise-based displacement to the visuals. |
3
|
WAVE | Distorts the entire screen with a wave-like motion. |
4
|
BLNK | Makes the entire screen blink in sync with the set BPM tempo. |
5
|
MIRR | Mirrors the visuals symmetrically to create kaleidoscope-like patterns. |
6
|
SHKE | Shakes the entire visual output intensely, suitable for bass hits and other triggers. |
7
|
TILE | Scales the visuals down and repeats them in a grid. |
8
|
CRT | Adds distortion and scanline noise reminiscent of old CRT monitors. |
9
|
FPS | Intentionally lowers the frame rate to create a choppy, stuttering look. |
🎞️ Right Panel: CLIP FX Effects (Individual Clip)
| Key | Effect Name | Visual Effect |
|---|---|---|
Q
|
ANIM | Loops the multiple animation frames registered in the clip. |
W
|
GLTCH | Breaks down the clip’s pixels individually and generates noise. |
E
|
WAVE | Applies wave-like distortion only to the clip’s coordinates. |
R
|
ROTN | Rotates the clip. The speed can be adjusted with the slider. |
T
|
SCRL | Continuously slides the clip in a chosen direction. |
A
|
CYCL | Cycles the palette colors in sequence, dynamically changing the color appearance. |
S
|
INVT | Inverts the clip’s colors, creating a negative-like effect. |
D
|
ZOOM | Scales the individual clip up or down. |
🎨 Creating Custom Palette Themes
In addition to the preset color palettes, you can create and register your own 4-color palettes.
- Open the settings menu with the
Mkey orEsc. - In the “CUSTOM PALETTE” section, set the 4 colors using the color pickers or by entering HEX values.
- Enter any palette name and press the
ADD NEW PALETTEbutton to register your original color theme.
💾 Saving and Restoring Data (Save & Load)
Data for created clips, animation frames, and custom palettes can be saved/exported locally as a single JSON file using the SAVE FILE button in the settings menu. The next time you use pxl.deck, you can load that JSON file with LOAD FILE to restore your previous pixel art and palette data.
TIPS: Saving the Output Image You can also right-click the output screen to save the currently displayed visual as an image.
👩💻 System Requirements
Recommended Environment
・Apple Silicon Mac / latest version of Google Chrome / macOS 13 Ventura or later
・A modern browser with WebGL enabled, plus a keyboard and mouse or trackpad
Performance depends more on your browser, GPU, and WebGL support than on the OS version itself.
☕ A Note from the Developer and Support Policy
This application is shareware, developed independently by a single developer. But rather than thinking of it as a strict payment for the features, I would be happy if you see it as a casual donation — something like buying the developer a cup of coffee.
Because this app is developed and maintained individually, I generally do not provide support such as a complete guarantee of operation or individual bug fixes. Depending on your PC or browser environment, the app may not work properly.
The app embedded at the top of this page is available as a free demo version. Aside from the "DEMO" watermark on the screen and the restrictions on saving and loading data, it offers the exact same features as the full version (paid version). Please feel free to play around with it to check the performance before making a purchase.
Purchase
In order to download this tool you must purchase it at or above the minimum price of $5 USD. You will get access to the following files:
Leave a comment
Log in with itch.io to leave a comment.